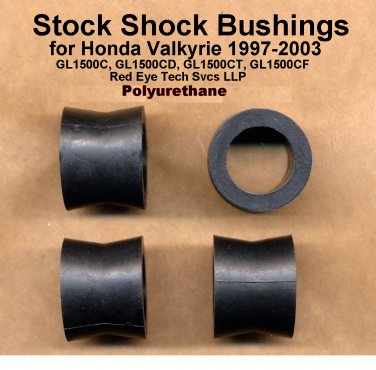
Stock Rear Shock Bushing Kit, Ver. 2 – Polyurethane
This is for the original Showa shocks, does not fit progressive shocks.
Fits all 1500cc Honda Valkyrie, 1997-2003
GL1500C GL1500CD GL1500CF GL1500CT
Contents: 4 Bushings (enough for both stock rear shocks)
What symptom does this fix?
Destroyed shock bushings, noisy shock bushings.
The Valkyrie likes to destroy its rear shock bushings. Honda supplies these bushings made of ordinary rubber, but they're dead in one season. The rubber bushing grabs too well to the upper shock bolt. This causes overstretching, overheating, so your original bushing material degrades into a bubblegum-like mush.
This particular bushing must be allowed to rotate (quietly) as needed on the upper shock bolt. Red Eye uses a special-purpose polyurethane that does not make noise while it is moving against metal, with lots of force. The additive is called a "soap" or "detergent", both of which are slang for zinc dialkyl dithiophosphate (ZDDP). It is hard to get this info from any polyurethane shop. It is a secret. Some kind of ZDDP works well as an friction reducing additive in polyurethanes. ZDDP is a whole class of chemicals nowadays, not just the one that was added to motor oil before the SN designation. Polyurethane shops can't tell their customer "We're using ZDDP in your PUR." That's because the customer will freak out and think "This donkey is putting motor oil in my polyurethane." Nope, they're removing the donkey from the polyurethane by sticking soap in there. It doesn't sound any better that way, does it? I give up.
The older version of these Red Eye bushings were made with nanopowder PTFE (Teflon) mixed in, and the mixing process was hated by the mold shop. They want solutions, not suspensions or dispersions. This version does not have any Teflon, in deference to the mold shop. This material was tested at Red Eye to make sure it stays slippery and quiet under 90 degrees angular deflection, under high load (500 pounds test weight on the bushing), under both hot and cold conditions (-10F straight out of the freezer, 200F straight out of the toaster oven).
These shock bushings are happy until they get really really hot. This can happen if you drive a long distance on a washboard patterned dirt road. Yes, I had a customer destroy their shock bushings that way, and probably their backbone and the rest of their Valkyrie.
Red Eye's informational web page: www.ValkParts.com .
Installation Suggestions
1. Put the bike up on a jack and remove the rear shocks.
2. For the lower bushings, remove the metal sleeves.
3. Try using a vise and a ratchet socket to push the bushings out of the shock eyelets. If that doesn't work, you can grab the edge of a bushing with needle nose pliers and twist until the bushing collapses and comes out. That will pretty much ruin your needle nose pliers.
4. Use a vise to push the new bushing into the shock eyelet. You may have to poke at the edges of the bushing to get it started into the eyelet.
5. Reinstall the metal sleeve in the lower bushing.
6. Adjust the jack height so the shock mount points are the same distance apart as the length of the shock.
7. Clean off the top mount, getting any dirt or grease off.
8. When installing a shock, it is convenient to install the lower bolt first. Then horse the upper shock end onto the top mount. After one shock is installed, you might have to lower the bike a little on the jack, so that once again the shock mount points are the same distance apart as the length of the remaining shock. Then install the second shock like the first one.
Information Website: https://www.valk-parts.com
https://sites.google.com/site/valkparts/
[!model:Valkyrie]